Visual Guide: The Underground Trial
| Player Guide Notice |
|---|
| This article is a Player Guide. Paragon Wiki takes no responsibility for the content within. Questions and concerns should be posed to the authors of the article using the article's talk page. |
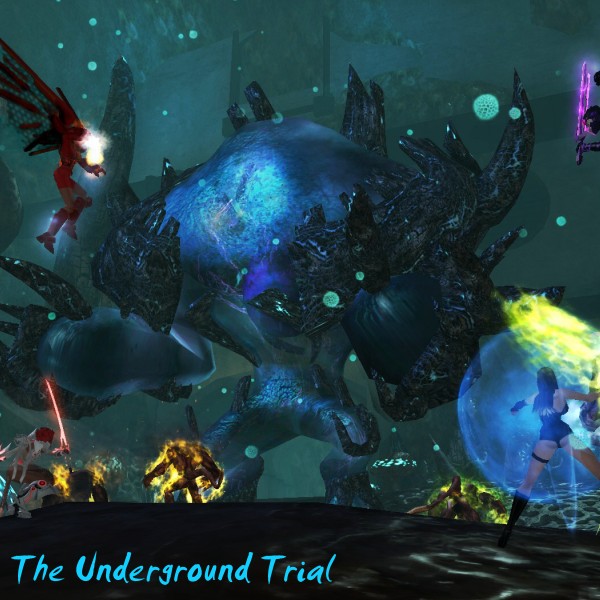 The Underground Trial |
Overview
This guide is intended to help players learn everything they'll need to know to complete the The Underground Trial.
Minimum players needed: 12
Maximum players allowed: 24
Incarnate XP: Psychic Incarnate Experience, Physical Incarnate Experience
Obtainable Badges: Underground Seeker, Tour Guide, Regenerate This, Preservation Specialist, Avatar Assassin, Master of the Underground
Part I: Stop the Ritual
- Objective 1: Defeat IDF (variable amount, 20-30)
- Time to complete: n/a
- Objective 2: Stop 4 Attack Waves (2 waves on each end of the Ritual Room, 10 attackers in each wave)
- Time to complete: n/a
- Merit Rewards: n/a
When your league zones into the trial Desdemona will pick a player to escort her through the Underground tunnels. The player she is following will bear the Mark of Leadership (an icon above their head). Desdemona will continue to follow this player until the player has been killed/disconnected or they have moved too quickly for her and she has fallen out of range. It's generally a good idea to have the player who Desdemona is following to stay at the tail end of the league since Desdemona has a tendency to attack everything in sight. It's also important to keep Desdemona alive. Desdemona is relatively tough, but if she dies at any point in the Underground, the trial will be failed.
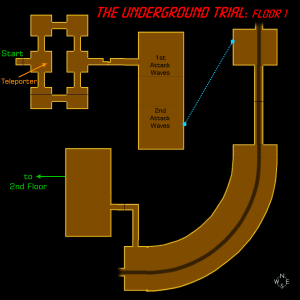
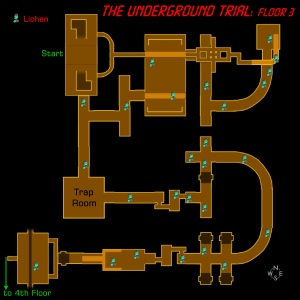
Before your league starts moving from the entrance, the league leader should let players know that a portal will appear on the floor in the entry room. If players stand in this portal (see Map #1, Teleporter), they will be teleported the furthest activated teleporting area. This will save players a ton of time instead of having to travel through the entire Underground to catch up with the league.
Once you begin to move forward, the Incarnate Trial UI window will tell you how many IDF your league needs to defeat to unlock the door leading to the next room. Once unlocked, head down the stairs and into the next room. Desdemona will need be escorted into this room before the ritual starts.
There are two parts to the ritual. Desdemona will begin performing the first part of the ritual at the north end of the room. IDF will try to stop her from performing the ritual, and will send two waves (each wave has 10 attackers). Once both of the waves have been fended off, take Desdemona to the south part of the room so she can perform the second part of the ritual. The IDF will again try to stop her, sending two more waves. Once the ritual has been completed, head through the southeast door.
Part II: The Extinction War Walker
- Objective 1: Defeat Lower Level Guards (variable amount, 40-60)
- Time to complete: n/a
- Objective 2: Defeat the Extinction War Walker
- Time to complete: 12 minutes
- Merit Rewards: 3 Astral Merits (from defeating Extinction War Walker)
This part of the trial begins with a small room of enemies to clear. After that you'll come to a large section of the tunnel that curves to the right. If you can stay tight to the wall on the right side of the tunnel, you may be able to save some time and only have to fight the enemies near you as you make it through the tunnel. If Desdemona (or another player) picks a fight with the groups on the left side, you may end up needing to clear the entire section. Either approach is fine to use, this is just an opportunity to save a little time on a somewhat lengthy trial.
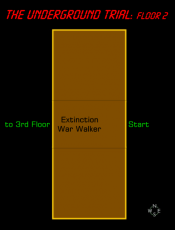
At the end of the curved section, hang a right and then a left into the first guard room. You'll need to defeat all of the lower level guards (shown in the Incarnate Trial UI window) in this room to advance to the next room. The league leader should direct everyone to hold for buffs at the entrance of the next room. Once all the lower level guards have been defeated, the timer to defeat the Extinction War Walker begins. Head through the door down to the next floor of the Underground. (end of Map #1)
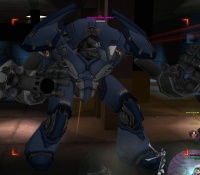
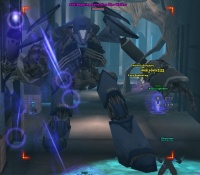
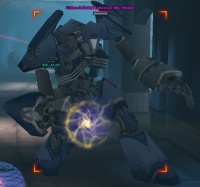
Once all or most of the league has made it into the next room, call for group buffs and then charge the Extinction War Walker (EWW). The EWW has 3 powerful AoE attacks to use against the league.
Lethal Force: (Extreme DoT; a quickly cyclying attack that deals 30% damage per cycle)
Arrest Mode: (AoE Hold; lasts 10 seconds)
Crowd Disperal: (AoE Fear; lasts 10 seconds)
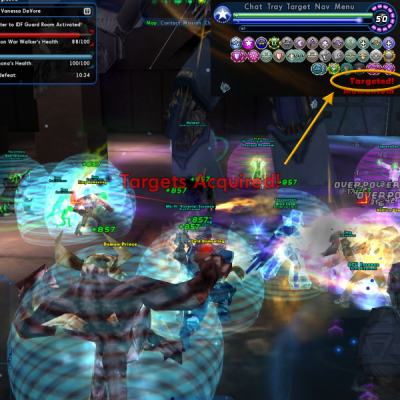
Several times throughout the fight, the EWW will acquire targets to use one of the above attacks on. The targets are acquired randomly from the players that are within 30 feet of the EWW. If you are targeted by the EWW, back away from the league as far as you can so other players don't get hit by the attacks. Once you are more than 120 feet away from the EWW, you'll be safely out of range of the impending attack. If you cannot move out of range in time, you and any players within 10 feet of you will be hit by it. The attack will fire a few seconds after targets have been selected. Once you are no longer being targeted, head back into the fight.
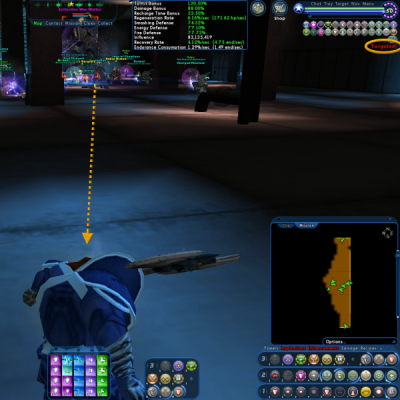
The best way to tell if you've been targeted is to look below your health/endurance bar. If you see "Targeted" in red letters, you need to back away from the league. If you are quick, you can also tell if you've been targeted by seeing the yellow targeting reticule appear at the base of your feet before it fades away.
Think of being targeted as a more subtle, yet dangerous variation of the sequestering rings used on the Behavioral Adjustment Facility Trial.
Remember to keep an eye on Desdemona during this fight and keep her healed if she is taking damage.
Once the Extinction War Walker has been defeated, head down to the next floor of the Underground. (end of Map #2)
Part III: Devouring Earth Trap
- Objectives: Rescue Desdemona from the Trap
- Time to complete: Destroy 4 Crystal Energy Traps before Desdemona is defeated
- Merit Rewards: n/a
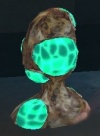
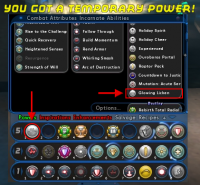
Continue moving forward, killing enemies and escorting Desdemona through the Underground passages. When you get to the stairwell, you'll start seeing Glowing Lichen appear in the tunnels. Clicking on one of these will give you a temporary power to use on the upcoming Self-Repairing Extinction War Walker.
Keep moving through the tunnels, collecting the Lichen temp powers along the way. Eventually you'll pass through a large, open room. After that room are some more tunnels that will lead to a medium sized, square shaped room. Desdemona needs to be lead into this room.
Once Desdemona makes it into the room, the trap is sprung. She is trapped in the middle of the room, unable to move or be healed.
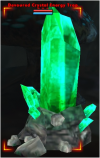
To free Desdemona from the trap, the league needs to destroy 4 Devoured Crystal Energy Traps. A crystal can be found in each corner of the room. Each crystal is guarded by a small group of Infested Devouring Earth. Defeat the foes near the crystal to stop it from instantly regenerating, and then destroy the crystal. You could pull the Infested DE away from the crystal, but that potentially puts Desdemona in harm's way, and they aren't terribly difficult to dispose of quickly in the first place.
The league leader may have everyone stick together and spike the crystals or split off into 2 or more groups. As long as all 4 crystals are destroyed before Desdemona is defeated you will have successfully freed her from the trap.
Heal Desdemona and continue moving forward through the tunnels.
Part IV: Self-Repairing & Lichen Infested War Walkers
- Objective 1: Defeat Lower Level Guards (variable amount, 40-60)
- Time to complete: n/a
- Objective 2: Defeat the Self-Repairing and Lichen Infested Extinction War Walkers
- Time to complete: 20 minutes
- Merit Rewards: 4 Astral Merits, 60 threads
- Defeating the Self-Repairing War Walker (2 Astral Merits)
- Defeating the Lichen Infested War Walker (2 Astral Merits)
- Mid-Trial Reward (60 threads)
At this point in the trial you should start to see the Glowing Lichen appear more and more frequently. Keep moving along, killing enemies and collecting the Lichen temp powers. When you reach the room with stairs along the left and right walls, head up the stairs. You'll need to defeat all of the lower level guards (shown in the Incarnate Trial UI window) to unlock the door to the next floor down.
Once the guards have all been defeated the door is unlocked and a 20 minute timer begins. Head through the door to the next floor of the Underground. (end of Map #3)
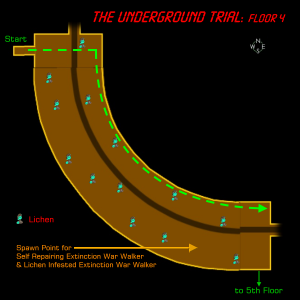
The hallway curves to the left and is filled with a bunch of temp powers. Whoever Desdemona is following should stay back for this part to avoid putting Desdemona in harm's way. The rest of the league should make their way to the northeast corner of the room, staying tight to the northern wall (follow the green line on Map #4) so they do not aggro the Self-Repairing Extinction War Walker. Hold there for a bit.
A tank/brute (assigned by the leader) will pull the Self-Repairing Extinction War Walker (SRWW) to the southeast corner of the room. Once the SRWW is in position, the league will begin attacking. The SRWW being positioned here does not matter too much for this fight, but it makes the next fight much easier by giving the tank a chance to pull the War Walker away from an area where several lichen will be helping it heal.
You'll need to use the Glowing Lichen temp powers on the SRWW to bring it's regeneration level down to a manageable level. Only one temp power can be used on the SRWW at a time, so if yours is not able to be used, it means one is currently effecting the SRWW. Any time you see the SRWW start to gain back health or that you are no longer harming it, it's a good time to use another lichen on it. The lichen that are in the room respawn rather quickly, so if you run out there are plenty more available to grab.
The SRWW uses the same three targeting attacks that the Extinction War Walker uses, so once again if you are targeted, back away from the league. If you have a taunt and you see the SRWW start moving away from the pull spot, please taunt the SRWW to keep it in that spot. The taunt tank probably was targeted and had to move away, with the SRWW chasing after the tank. Either way, you'll want to keep the SRWW and players that are not targeted in the southeast corner.
Once the SRWW has been defeated, the Lichen-Infested Extinction War Walker (LIWW) appears. The league (minus whoever Desdemona is following) should head to the southeast corner of the room this time (use the same route to get there to avoid aggroing the LIWW) and wait for the taunting tank/brute to pull the LIWW to the northeast corner of the room. Once the LIWW is in position, begin attacking.
The LIWW should be handled the same way as the SRWW was, with one difference. Instead of having a naturally high regeneration rate, the LIWW's regeneration rate is dependent upon nearby Lichen. The Lichen that previously were giving temp powers have now been turned into destroyable targets. Depending upon how well positioned the LIWW is in the northeast corner, only 1 or 2 lichen will be within range to effect the LIWW. Line of sight does not matter for this. If unsure, just destroy both lichens that are nearby. The lichen will respawn, so you'll need to keep destroying them. It may be helpful to pick 2 or 3 players to focus on making sure nearby lichen are destroyed immediately after they respawn.
If this part of the trial is turning into a disaster, the leader may want to consider bringing Desdemona into the fight. Just know that if Desdemona dies, the trial will be failed.
If your league is able to defeat both Extinction War Walkers before the 20 minute timer is up, the door to the next floor down is unlocked and you'll have earned the 60 thread mid-trial reward. Head down to the next level. (end of Map #4)
Part V: Spores, Demolition Charges, and the Avatar's Guards
- Objective 1: Escort Desdemona safely through the Underground Tunnels
- Objective 2: Defeat Avatar's Guards, IDF (variable amount)
- Time to complete: n/a
- Merit Rewards: n/a
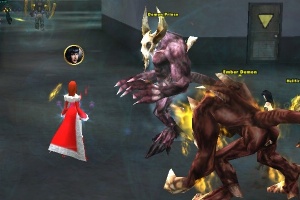
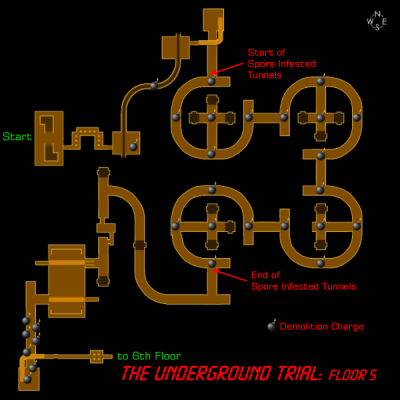
Continue moving forward, killing enemies and escorting Desdemona through the Underground passages. At this point, the leader may assign someone to run ahead of the group and trigger all of the demolition charges (29 in total, 4 of which are out of the way and do not need to be triggered) before the rest of the league gets to them. If you use this approach, make sure whoever you pick will be able to survive the damage over time from the spores present in the tunnels. If you are the one assigned to trigger the bombs, you won't need to trigger the one's in the middle of the 4 circular sections of the map unless the league is planning on defeating all enemies along the way. The rest of the players should stick together, killing the enemies in the tunnels so Desdemona can be safely escorted through them. Players that are caught in the explosion of these bombs will take a tremendous amount of damage.
If your league is planning on destroying the demolition charges before they explode, there are two ways to do so. You can huddle up before each demolition charge and rush all at the same time to spike it, or you can have players snipe at it out of range so that the charge is not triggered. The demolition charges will be triggered if a player comes within 150 feet of them. If you see a 10 second countdown timer starting above a demolition charge, it has been triggered and you have only a few seconds to finish destroying it before it explodes. Most of the demolition charges are far enough away from any other charges, so that if you are rushing them you will not trigger the next one. You can survive the blast from a demolition charge as long as you are within 30 feet of Desdemona and are being protected by her Ember Shroud shield. If you are not near her and are caught in one of the blasts, you will die.
There will be several ambushes be making their way toward you from further back in the tunnels. When you reach the four circular passages in the tunnel, you will start taking constant toxic and energy damage from the Devouring Earth spores in the Underground. In addition to damage, the spores reduce the effectiveness of any healing by 50%. These spores will also deal damage to Desdemona, so if there are any players with Speed Boost on the league, it is very helpful to have them cast it on her so she can quickly make it through the spore infested portion of the Underground. The player who is leading her through this part needs to be careful that she keeps following because she has a tendency to get stuck. When you have made your way through the circular sections of the Underground, you'll be out of the spore infested area and can continue advancing through the Underground.
After the next large room, there are 7 charges that are much closer together than you've seen up to this point. If you are charging them, you'll need to move onto the next one as soon as the previous one has been destroyed. Do not have players split up to do these seven or you will end up having triggered more charges than you need to have triggered at once. Focus on the one closest to you, then move onto the next one.
Once the league has defeated all of the Avatar's guards and made it to the end of this map, you'll be ready to enter the door to the lowest level of the Underground. Head down the the last floor, letting players know to stop at the bottom of the stairwell and wait for instructions. (end of Map #5)
Part VI: Defeat the Avatar of Hamidon
- Objective: Defeat the Avatar of Hamidon
- Time to complete: 12 minutes once the Avatar begins corrupting Desdemona
- Merit Rewards: 2 Empyrean Merits, 7 Astral Merits
- Trial completion (2 Empyrean Merits for the first completion in 20 hours, additional completions within 20 hours award 2 Astral Merits)
- Defeating the Avatar of Hamidon (2 Astral Merits)
- Open league (Astral Merit)
- Qualifying for Tour Guide (Astral Merit)
- Qualifying for Regenerate This (Astral Merit)
- Qualifying for Preservation Specialist (Astral Merit)
- Qualifying for Avatar Assassin (Astral Merit)
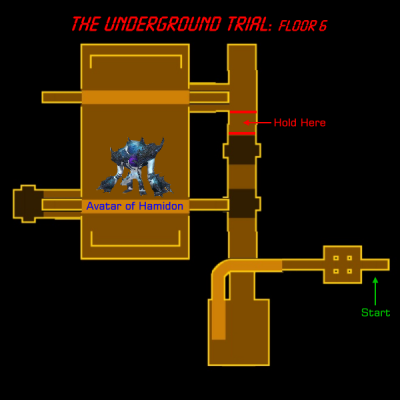
Once you've made your way to the floor near the bottom of the stairwell, have your league stop so you can go over the plan of attack for the Avatar with them. Also, let them know that if they die, this is the spot that they will be teleported back to if they use the teleporter located at the beginning of the trial.
There are many variations of strategies to use for the Avatar, but this one seems to have been working particularly well. First, you will defeat the three groups that are in the straight part of the tunnel here, stopping right after you've moved across the water spot, but before the tunnel connecting to the Avatar's room (see the hold spot on Map #6). The leader should assign a primary, secondary, and tertiary tank if possible. At this time, the league should hold off on using any Destiny/group buffs so they are ready to be used when needed. Next, players with single target buffs should buff the primary tank. The primary tank will quickly head into the Avatar's room, triggering the cutscene.
After the cutscene the primary tank will taunt the Avatar to get its attention and position it in the room. The rest of the league (including the person escorting Desdemona) should summon their Lore pets, cast Destiny/group buffs, then quickly head into the Avatar's room and begin attacking its back. Only the primary tank should be taunting the Avatar at this time; this will help the league more easily control which direction the Avatar is facing. If the primary tank is killed, the secondary tank needs to be ready to jump in and begin taunting the Avatar, and so on down the line. If the third tank is defeated, hopefully the first one is back by that time or you will have to improvise.
There are several nasty attacks that the Avatar of Hamidon uses.
- Discordant Spores: This is a PBAoE confuse with a 600 foot radius. This power is a mag 20 confuse that does not require line of sight and is used every 20 seconds. The confuse lasts for 10 seconds.
- Will of the Earth (Grasp of Gaea): This power works like the other powers that use a targeting selection system. The player that is targeted by Will of the Earth has 6 seconds to move away from the rest of the league before players near them are damaged and the Avatar heals. The damage scales based on how many players are caught in the attack. It will hit for a minimum of 15% damage and increase by 5% per additional player caught up to a maximum of 50% damage. The Avatar heals 2% per character effected by the attack.
- Cripple: This is a cone attack that the Avatar uses to drain players of endurance. A target is chosen at random, and a few seconds later the Avatar fires the attack at the location where the target was when they were selected. You can avoid being hit by this attack by continually staying to the back of the Avatar.
- Devour: This is a PBAoE buff (40 foot radius) for damage and tohit for the Avatar.
- Infection: This is a PBAoE debuff (40 foot radius) that lowers resistance and defense by 33%.
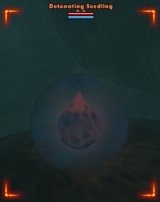
Shortly after the cutscene is triggered, a 12 minute timer begins. You have until the end of that timer to defeat the Avatar or it will have fully corrupted Desdemona and the trial is failed. Not too long after the timer begins, Detonation Seedlings start to spawn every 30 seconds. Any player within the blast radius of these will take 25% damage.
Since this you'll be constantly subjected to confuse during this fight, it is critical that you do not cast any buffs while confused. If anything buffs the Avatar, this fight becomes a whole lot more difficult. Remember, you can easily tell if you are confused by looking for a red "Confused" below your health/endurance bars or if you see player names in their normal green/blue-green color. If you see orange player names, do not cast any buffs.
When the Avatar casts Will of the Earth, check below your health/endurance bars to see if you are the target of the attack. If you are, you'll see "Consumed" in red letters, and you should back as far away from the league as you can so the Avatar only heals off of/damages you.
If the Avatar turns his direction during the fight, reposition your character quickly so that you are always facing the back of the Avatar (the taunting tank excluded). This will help you avoid his endurance draining Cripple attack.
Another cutscene is played once the Avatar of Hamidon has been defeated.
Upon completion of the trial you will be awarded the Underground Seeker badge and receive your reward pool window. Players who were active during the entire trial will receive a rare or very rare reward pool.
| |
Underground Seeker You have completed the Incarnate Trial: Underground. |
Master of the Underground
The Master of the Underground badge can be earned in one attempt of the trial. The four badges needed to earn Master of the Underground are:
| |
Tour Guide While escorting Desdemona through the Underground, you never let her drop below half health. |
Tour Guide can be easily earned by assigning a character to keep Desdemona healed throughout the trial. If she drops below 50% at any point, the badge no longer can be earned. Since she cannot be healed when she is trapped by the crystals, you'll need to be quick in destroying them before she has taken too much damage.
| |
Regenerate This You blitzed the Self-Repairing and Lichen Infested War Walkers within 8 minutes of starting combat in the Underground. |
The Regenerate This badge is also an easy one to earn. Just defeat both the Self-Repairing and Lichen Infested Extinction War Walkers before 8 minutes have elapsed. Don't forget to use Lore pets if your league needs additional firepower.
| |
Preservation Specialist The Demolition Charges sent by the IDF to take out the Underground didn't pose a threat to your league, and you were able to take all of them out without a single detonation. |
You'll probably want to announce ahead of time if you are planning on making an attempt at the Preservation Specialist badge. This badge can be easily screwed up by one player running ahead, so make sure whoever you recruit for this can be patient. This can be done using the rushing or sniping approach. The players just need to be patient and follow the direction of the leader for when to attack the demolition charges. If using the rushing approach, when you get to the final stretch of charges you'll need to move quickly from charge to charge to destroy them all before they blow up.
| |
Avatar Assassin You took a risk and managed to defeat the Avatar of Hamidon in the Underground at the same time a Detonating Seedling was about to go off. |
The easiest way to earn the Avatar Assassin badge is to have 1 or 2 ranged characters look for the seedlings in the Avatar's room. Once the Avatar is getting below 20% health, those players should be prepared to strike the seedlings just as the Avatar is about to be killed. If your league is well coordinated, you can direct them to hold off a bit on the Avatar to wait for another seedling to spawn if one is not currently out, and then resume the attack once it is there.
When you have collected all four badges, you will earn the Master of the Underground badge and be awarded a random rare incarnate component.
| |
Master of the Underground You have mastered the Incarnate Trial: Underground. |
Notes, Tips, & Strategy
- Tips for Leaders
- Communicate clearly how you wish the trial to be run. Call out assignments ahead of time. Remind them again right before the moment arrives.
- Find out if there are any players on your league that are new or inexperienced with the trial. Explain to them the basics of the in-zone teleporter, escorting Desdemona, the targeting systems used by the War Walkers, the range/potency of the bombs, and the attacks used by the Avatar. If you are busy (understandably) with trying to recruit, lead, or communicate your plan of attack, ask an experienced player if they can mentor a player that is new to the trial. The more knowledgeable players are about the trial, the better it will go.
- If you are leading a group that is light on level shifts, don't necessarily expect that things will run as smoothly as they would with a stronger league.
