Difference between revisions of "The Players' Guide to the Cities/User Interface"
m (Suppressing display of date information on legacy use of {{wip}}; cosmetic changes) |
Felderburg (Talk | contribs) m (wip->incomplete. added player guide template) |
||
| (2 intermediate revisions by 2 users not shown) | |||
| Line 1: | Line 1: | ||
| − | {{ | + | {{incomplete|note=This appears to need more content, or a clarification that it is just a table of contents for other articles. It appears, however, that there is very little about the UI here.}} |
| + | |||
| + | {{PlayerGuide}} | ||
= Windows = | = Windows = | ||
| Line 22: | Line 24: | ||
Detailed mechanics of each window are explained in detail in articles contained within the [[:Category:User Interface|User Interface]] category outside of the Players' Guide to the Cities. Additional tips on the use of a few of the windows can be found in the following articles: | Detailed mechanics of each window are explained in detail in articles contained within the [[:Category:User Interface|User Interface]] category outside of the Players' Guide to the Cities. Additional tips on the use of a few of the windows can be found in the following articles: | ||
| − | * [[{{NAMESPACE}}: | + | * [[{{NAMESPACE}}:The Players' Guide to the Cities/User Interface/Chat Window|Chat Window]] |
| − | * [[{{NAMESPACE}}: | + | * [[{{NAMESPACE}}:The Players' Guide to the Cities/User Interface/Search Window|Search Window]] |
| − | * [[{{NAMESPACE}}: | + | * [[{{NAMESPACE}}:The Players' Guide to the Cities/User Interface/Super Group Window|Super Group Window]] |
| − | * [[{{NAMESPACE}}: | + | * [[{{NAMESPACE}}:The Players' Guide to the Cities/User Interface/Email Window|Email Window]] |
| − | * [[{{NAMESPACE}}: | + | * [[{{NAMESPACE}}:The Players' Guide to the Cities/User Interface/Tray Window|Tray Window]] |
| − | * [[{{NAMESPACE}}: | + | * [[{{NAMESPACE}}:The Players' Guide to the Cities/User Interface/Powers Window|Powers Window]] |
| − | * [[{{NAMESPACE}}: | + | * [[{{NAMESPACE}}:The Players' Guide to the Cities/User Interface/Inspirations Window|Inspirations Window]] |
| − | * [[{{NAMESPACE}}: | + | * [[{{NAMESPACE}}:The Players' Guide to the Cities/User Interface/Enhancements Window|Enhancements Window]] |
| − | * [[{{NAMESPACE}}: | + | * [[{{NAMESPACE}}:The Players' Guide to the Cities/User Interface/Salvage Window|Salvage Window]] |
| − | * [[{{NAMESPACE}}: | + | * [[{{NAMESPACE}}:The Players' Guide to the Cities/User Interface/Recipes Window|Recipes Window]] |
| − | * [[{{NAMESPACE}}: | + | * [[{{NAMESPACE}}:The Players' Guide to the Cities/User Interface/Target Window|Target Window]] |
| − | * [[{{NAMESPACE}}: | + | * [[{{NAMESPACE}}:The Players' Guide to the Cities/User Interface/Action Window|Action Window]] |
| − | * [[{{NAMESPACE}}: | + | * [[{{NAMESPACE}}:The Players' Guide to the Cities/User Interface/Nav Window|Nav Window]] |
| − | * [[{{NAMESPACE}}: | + | * [[{{NAMESPACE}}:The Players' Guide to the Cities/User Interface/Map Window|Map Window]] |
| − | * [[{{NAMESPACE}}: | + | * [[{{NAMESPACE}}:The Players' Guide to the Cities/User Interface/Contact Window|Contact Window]] |
| − | * [[{{NAMESPACE}}: | + | * [[{{NAMESPACE}}:The Players' Guide to the Cities/User Interface/Mission Window|Mission Window]] |
| − | * [[{{NAMESPACE}}: | + | * [[{{NAMESPACE}}:The Players' Guide to the Cities/User Interface/Clues Window|Clues Window]] |
| − | * [[{{NAMESPACE}}: | + | * [[{{NAMESPACE}}:The Players' Guide to the Cities/User Interface/Badge Window|Badge Window]] |
| − | * [[{{NAMESPACE}}: | + | * [[{{NAMESPACE}}:The Players' Guide to the Cities/User Interface/Menu Window|Menu Window]] |
| − | * [[{{NAMESPACE}}: | + | * [[{{NAMESPACE}}:The Players' Guide to the Cities/User Interface/Help Window|Help Window]] |
| − | * [[{{NAMESPACE}}: | + | * [[{{NAMESPACE}}:The Players' Guide to the Cities/User Interface/Costume Window|Costume Window]] |
| − | * [[{{NAMESPACE}}: | + | * [[{{NAMESPACE}}:The Players' Guide to the Cities/User Interface/I.D. Screen|I.D. Screen]] |
| − | * [[{{NAMESPACE}}: | + | * [[{{NAMESPACE}}:The Players' Guide to the Cities/User Interface/Info Window|Info Window]] |
| − | * [[{{NAMESPACE}}: | + | * [[{{NAMESPACE}}:The Players' Guide to the Cities/User Interface/Support Window|Support Window]] |
| − | * [[{{NAMESPACE}}: | + | * [[{{NAMESPACE}}:The Players' Guide to the Cities/User Interface/Options Window|Options Window]] |
| − | * [[{{NAMESPACE}}: | + | * [[{{NAMESPACE}}:The Players' Guide to the Cities/User Interface/Trade Window|Trade Window]] |
| − | * [[{{NAMESPACE}}: | + | * [[{{NAMESPACE}}:The Players' Guide to the Cities/User Interface/Quit Window|Quit Window]] |
See also: | See also: | ||
Latest revision as of 16:30, 12 November 2014
| Player Guide Notice |
|---|
| This article is a Player Guide. Paragon Wiki takes no responsibility for the content within. Questions and concerns should be posed to the authors of the article using the article's talk page. |
Windows
There are several windows that you may display in your user interface that will aid in navigating through the game, surviving your encounters, and communicating with other players.
Several of these windows display general information and are able to spawn other windows with more detailed information. This may be done by clicking on the name of the child window you wish to open. You may then close the child window by clicking on the name of the window again. You may also close windows by clicking on the small red 'X' bubble in either the lower or upper right hand corner of the window.
Often, child windows are attached to their parent by default and will move with the parent window. When anchored to parent windows, opening a second child window from the same parent will close the first child window.
Some child windows can be released from their parents and allowed to float. Floating windows may be dragged to new locations and can often be enlarged to display more detail or shrunk to be placed off to the side where they will serve as information, but not interfere with your interaction with the world. In addition, a window that is floating can be opened and closed independently of the child windows belonging to the same parent window.
For example, if the Map Window is anchored to the Nav Window, moving one will move the other. If you have the Map Window open and decide to open the Badge Window (which, in this example we will assume is also anchored), the Map Window will close and the Badge Window will open. However, if the Map Window is floating and you decide to open the Badge Window, doing so will not close the Map Window. Similarly, if the Map Window is set to float and the Badge Window is currently open, opening the Map Window will not close the Badge Window.
In order to set a child window to float, click on the bubble in the upper or lower left corner of the child. If the bubble is filled, the window will be anchored. If the bubble is empty, the window is floating.
Many windows can be resized by clicking on the outer borders of the window and dragging them to make the window larger or smaller in size.
Clicking in the tab on the upper or lower border of any floating window will allow you to drag the window around the screen to reposition it.
In a few cases, windows may have sections within them that may be resized by clicking the borders between sections and dragging them to reallocate space. Columns of information in the Super Group Window and the divider between the upper and lower chat tabs in the Chat Window are just two examples of this.
Detailed mechanics of each window are explained in detail in articles contained within the User Interface category outside of the Players' Guide to the Cities. Additional tips on the use of a few of the windows can be found in the following articles:
- Chat Window
- Search Window
- Super Group Window
- Email Window
- Tray Window
- Powers Window
- Inspirations Window
- Enhancements Window
- Salvage Window
- Recipes Window
- Target Window
- Action Window
- Nav Window
- Map Window
- Contact Window
- Mission Window
- Clues Window
- Badge Window
- Menu Window
- Help Window
- Costume Window
- I.D. Screen
- Info Window
- Support Window
- Options Window
- Trade Window
- Quit Window
See also:
Targeting Reticle
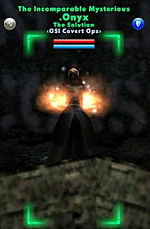
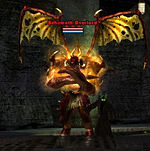
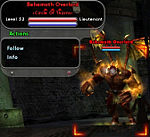
Whenever you target an object in the game, a group of four brackets will appear to form a box around the object, calling attention to your active target. Along with the brackets, the target's name, faction, and status bars will appear above the target. This display is referred to as the "reticle".
Targeting a friendly character that is not on your team will produce a blue reticle, while targeting a friendly character on your team will produce a green reticle. When a friendly target is selected, any powers that require targeting an ally will directly affect your current target and any powers that require targeting a foe will be redirected to whatever foe your target has selected (if any.) This redirection of your attacks is known as "assisting".
Assuming you have the option turned on in the Options Window, you will be able to identify your assist target by locating the enemy with its name and status bars displayed above its head without colored brackets. If you wish to switch to targeting this enemy directly, you may do so with the /assist command.
When targeting a hostile mob or character, the brackets on your reticle will appear in orange. When a hostile target is selected, any powers that require targeting a foe will directly affect your current target and any powers that require targeting an ally will be redirected to whatever ally your target has selected (if any.) Note that there is no indication of which target an enemy has selected.
The reticle will appear in white when targeting either a non-combatant NPC or a character that is currently AFK.


