Difference between revisions of "Shadow Shard"
(→Jumping) |
(Rewrote the geyser travel. The existing one was wrong in many ways.) |
||
| Line 65: | Line 65: | ||
The jump jet from the Good versus Evil edition is worthy of its own note. Firstly it can be used as an emergency help if a geyser jump misfires. Secondly, when combined with Super Jump, it allows the character to leap across several islands, or some of the larger gaps without any issue. And thirdly, combined with Fly, it will boost the speed of flight slightly for 30 seconds. | The jump jet from the Good versus Evil edition is worthy of its own note. Firstly it can be used as an emergency help if a geyser jump misfires. Secondly, when combined with Super Jump, it allows the character to leap across several islands, or some of the larger gaps without any issue. And thirdly, combined with Fly, it will boost the speed of flight slightly for 30 seconds. | ||
| − | == Getting around | + | == Getting around via gravity geyser == |
[[Image:Geyser.jpg|right|thumb|250px|{{center|Using the geyser should propel you to the far island... hopefully}}]] | [[Image:Geyser.jpg|right|thumb|250px|{{center|Using the geyser should propel you to the far island... hopefully}}]] | ||
| − | The | + | The first person you'll see in [[Firebase Zulu]] is [[General Hammond]] and the first mission he will give you is a tutorial on how to use the [[Gravity Geyser|Gravity geysers]]. Gravity geyser travel is a pretty different animal so pay attention! Teleporters don't need this mode of travel, really, but super jumpers and super speeders will. Fliers don't need it but the geysers can shorten their travel time by a good bit so it's worth learning. |
| − | + | Unfortunately, what the general tells you is not entirely true, which has caused a lot of player confusion. | |
| − | + | Stepping on a geyser is much like stepping on a cannon. Each geyser has a 'slot' in the rock that leads up to the geyser itself. To use the geyser, slowly move up that slot and be sure you go '''straight up the center'''. These things shoot you a long way so being even a little off is bad. Once you are in the air, your controls are limited. If you try to go backwards then you will immediatly stop moving forward. If you try to go left or right then you will lose most of your forward momentum fall ''unless you also have the forward key pressed down.'' However, if you do keep that forward key down (probably the 'W' key), you can steer yourself a lot by pushing the left and right keys. Just make sure you keep that forward key down! Holding down the forward key will cause you to go faster forward but will not break anything. | |
| − | + | Despite what General Hammond says, people with superjump and superspeed '''should''' keep their travel power activated. Doing so increases your ability to steer. Given how often geysers will drop you right into a hostile Rularuu spawn and how easy it is to be a few degrees off as you go up the geyser, the ability to steer is very important. Turning on a flight power will stop you dead so you don't want that on when geyser jumping, but turning it on after you miss a jump can save you a lot of frustration early on. | |
| − | + | Verticle geysers can be particularly difficult. There's a geyser just south of Point Charlie in Firebase Zulu that can be greatly frustrating to new Shadow Shard players. Done correctly, the geyser will should you almost straight up and you will land on an outcrop of rock sticking out of the island above. If you come at the geyser wrong, though, you will fall to either side of the outcrop. Also, if you hold down your forward key just a little too long, you'll go too far forward and bump your head on the bottom of the outcrop of rock. Having a travel power on magnifies this effect. However, even if you mess up a bit on the geyser, you can still easily correct the jump by steering. All you have to do is watch where you are going! In fact, with superjump or superspeed, you can steer yourself right to the next geyser's slot and save yourself some time! | |
| − | + | ||
| − | + | ||
| − | + | It's not too hard to tell where a geyser is going most of the time. Simply look down the rock slot and you'll see where you are going. The only exception to this is verticle geysers. | |
| + | |||
| + | All that said, you '''will''' need practice to learn how to do this. If you have never used geyser before, don't try to learn them when people are waiting on you. Go in solo and set aside some time just to learn the system. Enemies in the Shard are very rough for a single player so you might want to wait until you have a few levels past 40 and/or some good stealth to help keep the wildlife off you while you practice your cannonball runs. Once you get the system figured out and some practice under your belt, though, you'll rarely fall and will be able to get around the giant zones fairly quickly. | ||
| + | |||
| + | Note that there are two geysers (one in the Chantry and one in the Storm Palace) that shoot you straight up. If you don't steer, you will land right back at the geyser you jumped from! You'll have to figure out yourself which way you want to go and go there. Both of them shoot you very high so you'll have plenty of time to steer, assuming you have superjump or superspeed on. | ||
[[Category:Game Background]] | [[Category:Game Background]] | ||
Revision as of 00:24, 2 May 2008
This entire dimension is suffused with a mystic power.
As if it was all the construction of a single vast consciousness.
As if we were walking among the dreams of a god...
- Akarist, Circle of Thorns mage
Contents
Overview
The Shadow Shard is an alternate dimension permanently linked to by Portal Corporation. It is called the Shadow Shard because among its inhabitants are many that appear as shadows of familiar enemies from the rest of the game.
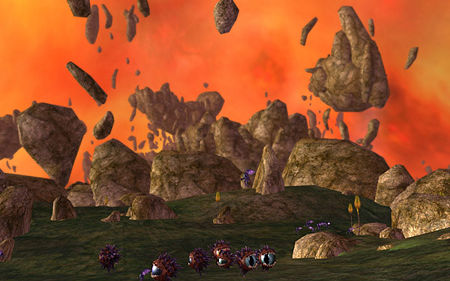
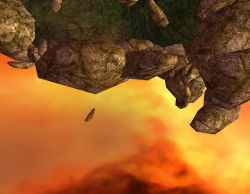
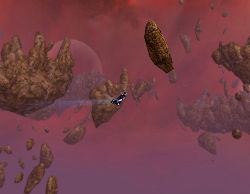
The Shard is a world of islands and rocks floating in a strange-colored sky. Humans from the main CoX dimension have begun to explore the zone, and have set up bases of varying sizes across the shard.
The Shard is made up of four different zones. Firebase Zulu, Cascade Archipelago, The Chantry, and The Storm Palace. All are hazard or trial zones. Minimum level to enter the first zone of the shard is level 40, and the deeper zones have progressively higher minima. There is a hospital in Firebase Zulu.
Enemies across the Shard include natives like the Shadow Shard Reflections, Soldiers of Rularuu, Storm Elementals, and visitors from the human dimension such as the Circle of Thorns, Crey and Nemesis.
Several Task Forces are organized out of the Shard, and missions may be run from several contacts in the zone who will give unlimited missions to high level heroes.
While villains can not visit the Shadow Shard itself, several higher level contacts (such as Technician Naylor) offer instanced trips into the Shard.
Mapping
As the Shadow Shard maps are all considered Trial zones, the player mini map is initially set to black. This makes navigation... challenging, to say the least. Certain transport methods (below) often require a literal "leap of faith", until the player becomes familiar with a particular zone.
If you look closesly at a Shadow Shard map, you should see faint green lines that show where the geyser will send you but you can't always see where those lead until you take the jump. Also, many jumps are vertical and thus don't show up on the 2D map. Still, they are a handy way to plot out where you should go to get to a given mission door after you've been in the Shard for awhile.
The Shard maps historically were often affected by a map-reset bug that was fixed in I9.
Effects within the Shadow Shard
One interesting effect present everywhere within the Shadow Shard is that gravity is "different", meaning that a fall of ANY distance will not damage the player in any way. Given that some drops are long enough to reduce even the hardiest Level 50 Tanker to a single HP; this is a boon.
You might be wondering what happens if you happen to fall off one of these islands. Assuming there isn't another island somewhere below you, you will fall for quite a distance and then get teleported back to a safe place on the first island in the zone (the one with the teleport gateway back to Zulu or Firebase Zulu itself if you are in its zone). This can be a major pain if you are trying to get to a destination via gravity geyser and miss. However, it can be used to your advantage as well. If you are deep in a Shadow Shard zone and want to get back to Paragon City quickly, just jump over the side of the island and take the nearby teleport. Also, if you are in a fight that isn't going well (and you aren't having this fight on the first island of the zone), you can use the edge as a fast escape!
It is different for enemies. Enemies that can't fly and drop over the side are never seen again. They are not defeated so you will not get xp or badge credit, they just vanish.
Getting around without using geysers
The Shadow Shard houses the largest zones in the game — some can take many minutes of continuous use of travel powers to cross.
Fly
As the zones are comprised of floating islands, truly in three dimensions. Flight powers are greatly appreciated. Group Fly often makes its only use here, although the restrictions on proximity and the demands of Endurance drain represents a major drawback. Note that geysers do shoot you around at very high speed so, if you see one going your way, it's worth using.
Teleport
Teleport powers are also considered "essential", not only for the fast three-dimensional movement, but also for "Recall Friend". The Shadow Shard represents some of the only zones where the maximum range of Recall Friend is regularly exceeded, requiring the teleportee to try to keep up, at least somewhat.
Jumping
Jumping powers are useful for minor sorties into the Shadow Shard; however, most islands are deliberately placed to be further than the maximum distance. You are probably going to need to use the geysers for most of your travel.
Super Speed
All in all, those with Super Speed are most likely to be left behind. Not only is movement difficult (but not impossible), the native Soldiers of Rularuu have a large number of +Perception foes, reducing the effectiveness of the +Stealth component of Super Speed.
Good vs. Evil Jump Jet
The jump jet from the Good versus Evil edition is worthy of its own note. Firstly it can be used as an emergency help if a geyser jump misfires. Secondly, when combined with Super Jump, it allows the character to leap across several islands, or some of the larger gaps without any issue. And thirdly, combined with Fly, it will boost the speed of flight slightly for 30 seconds.
Getting around via gravity geyser
The first person you'll see in Firebase Zulu is General Hammond and the first mission he will give you is a tutorial on how to use the Gravity geysers. Gravity geyser travel is a pretty different animal so pay attention! Teleporters don't need this mode of travel, really, but super jumpers and super speeders will. Fliers don't need it but the geysers can shorten their travel time by a good bit so it's worth learning.
Unfortunately, what the general tells you is not entirely true, which has caused a lot of player confusion.
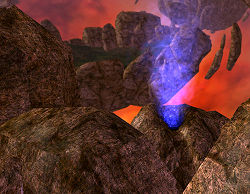
Stepping on a geyser is much like stepping on a cannon. Each geyser has a 'slot' in the rock that leads up to the geyser itself. To use the geyser, slowly move up that slot and be sure you go straight up the center. These things shoot you a long way so being even a little off is bad. Once you are in the air, your controls are limited. If you try to go backwards then you will immediatly stop moving forward. If you try to go left or right then you will lose most of your forward momentum fall unless you also have the forward key pressed down. However, if you do keep that forward key down (probably the 'W' key), you can steer yourself a lot by pushing the left and right keys. Just make sure you keep that forward key down! Holding down the forward key will cause you to go faster forward but will not break anything.
Despite what General Hammond says, people with superjump and superspeed should keep their travel power activated. Doing so increases your ability to steer. Given how often geysers will drop you right into a hostile Rularuu spawn and how easy it is to be a few degrees off as you go up the geyser, the ability to steer is very important. Turning on a flight power will stop you dead so you don't want that on when geyser jumping, but turning it on after you miss a jump can save you a lot of frustration early on.
Verticle geysers can be particularly difficult. There's a geyser just south of Point Charlie in Firebase Zulu that can be greatly frustrating to new Shadow Shard players. Done correctly, the geyser will should you almost straight up and you will land on an outcrop of rock sticking out of the island above. If you come at the geyser wrong, though, you will fall to either side of the outcrop. Also, if you hold down your forward key just a little too long, you'll go too far forward and bump your head on the bottom of the outcrop of rock. Having a travel power on magnifies this effect. However, even if you mess up a bit on the geyser, you can still easily correct the jump by steering. All you have to do is watch where you are going! In fact, with superjump or superspeed, you can steer yourself right to the next geyser's slot and save yourself some time!
It's not too hard to tell where a geyser is going most of the time. Simply look down the rock slot and you'll see where you are going. The only exception to this is verticle geysers.
All that said, you will need practice to learn how to do this. If you have never used geyser before, don't try to learn them when people are waiting on you. Go in solo and set aside some time just to learn the system. Enemies in the Shard are very rough for a single player so you might want to wait until you have a few levels past 40 and/or some good stealth to help keep the wildlife off you while you practice your cannonball runs. Once you get the system figured out and some practice under your belt, though, you'll rarely fall and will be able to get around the giant zones fairly quickly.
Note that there are two geysers (one in the Chantry and one in the Storm Palace) that shoot you straight up. If you don't steer, you will land right back at the geyser you jumped from! You'll have to figure out yourself which way you want to go and go there. Both of them shoot you very high so you'll have plenty of time to steer, assuming you have superjump or superspeed on.


