The Players' Guide to the Cities/User Interface/Map Window
< The Players' Guide to the Cities | User Interface
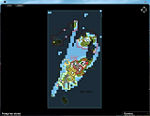
The Map Window may be opened either by clicking on "Map" on the outer edge of the Nav Window or selecting "Map" from the Menu Window.
At the top of this window are two tabs labeled "City" and "Zone" or "Mission". Clicking on the "City" tab will display a map of Paragon City for heroes, or a map of the Rogue Isles for villains. Selecting the "Zone" or "Mission" tab will display a map of the zone or mission you are currently located in.
In zone maps, the name of the zone will appear in the lower left corner of the map. In the lower right corner is a dropdown options menu. You may click on this menu to turn the different icons and names on your map on or off.
On the right side of the window is a slider that allows you to zoom in or out on the map. Sliding the marker up will zoom out, while sliding the marker down will zoom in. If you zoom in far enough that the entire map no longer fits in the Map Window, you may drag the map around inside the window to view other areas on the map. If you move, the map will automatically reposition in the window with you in the center.
Fog of War
Until you have visited a location on your map, it will not appear with full clarity. This is referred to as "fog of war." Areas you have not visited on zone maps will be grayed-out, while mission maps are completely dark except for the areas you have explored. On mission maps, if any team member visits an area on the map, it becomes visible on the map for everyone on the team. On zone maps, only the areas you have visited will become clear on your map.
Map Icons
There are several common map icons you should be familiar with. Most of these icons can be seen even if their location is covered by "fog of war."
Common Icons
Special Event Icons
| Icon | Represents | ||
| Banner of Fiends (Deadly Apocalypse) | Banner of Mayhem (Deadly Apocalypse) | ||
| Banner of Terror (Deadly Apocalypse) | Banner of Scorn (Deadly Apocalypse) | ||
| Entrance to Lord Winter's (Winter Event) |
possibly unused/obsolete
| Team Leader | |
| Safe Zone Barrier | |
| Hazard Zone Barrier | |
| PvP Zone Barrier | |
| Helipad |
Waypoints and Thumbtacks
You can click on any icon on the map (except for the one that represents you) to make it a waypoint. When you have set a waypoint, it acquires an animated highlight on your map, and the icon appears on your compass in the Nav Window. When you are facing toward a waypoint, the distance to it will be displayed in feet, yards, or miles. Basically, if you know where you want to go, making that spot a waypoint will make it much easier to get there. Naturally, if you set a waypoint on a mobile icon (i.e. a teammate), the direction and distance to your waypoint will change as the waypoint moves around. You may only select one waypoint at a time.
Sometimes, during missions, the game will set a waypoint for you, pointing the way toward your next mission objective. These game-set waypoints appear in red, and it is possible to have more than one of these waypoints active at the same time. It is also possible to have a player-set waypoint active at the same time as a game-set waypoint.
A thumbtack is a sort of portable waypoint. You can right click anywhere on a zone or mission map to set a thumbtack at that location. You may even set a thumbtack in an area covered by fog of war. You may only have one thumbtack visible at any time. If you right click on another part of the map, your thumbtack will move to that new location. If you right click on the thumbtack itself, it will be removed from the map.
Once you have a thumbtack set, you can use it like any other map icon, including using it as a waypoint if you wish. Note that if you log off, the thumbtack will be gone when you return to the game.
