Jimmy Dortz
Overview
Jimmy Dortz is a second possible contact you will meet if you go through the Breakout tutorial zone. He is located at (-2,293, -160, 762).
Contents
Introductions
Contact Introduced By
New Contact(s)
Sakai Tamaki does not have any introduction text. He can be talked to directly and bypass all previous tutorial contacts.
Information
Model Inmate
Jimmy Dortz is what the Zig likes to call a 'model inmate'. He never disobeys any of the rules, and is always gaining the favor of the guards by making their jobs easier. What no one realizes is the Dortz is actually manipulating the whole scene. He rats out prisoners that he wants to see punished, and in doing so he earns favor with the guards, which he uses to get privileges that other inmates don't. For as much 'good behavior' that Dortz seems to gain, you really don't want to get on his bad side.
Prior to Introduction
Hey, I don't know you. If you're new, you should probably be talking to H.T. (Click this contact to begin) instead of me.
Introduction
So you're the one called Character, eh? Well, all sorts of guys and gals locked up here have powers, but some need gadgets to make their powers work, or just to make them work better. I can give you access to the lockers that hold all these devices, and after you go there and get something for me, I can help show you how to use them.
No More Missions
You got your devices, now go see Sakai Tamaki.
Tamaki can be found in the Yard. Go to the room with the big hole in the floor and jump into it, then follow the tunnel to the metal gates. Click on the gates and that will take you up into the Yard where you can find Sakai Tamaki.
Missions
Get Shiv
Briefing
Ok, last week I had my buddy's shiv confiscated by one of the new guards here. As a favor to him, I told him I'd get it back.
They locked it up in the gallery with all the other gadgets and weapons confiscated from the villains locked up here. Tell ya what, you go get me that shiv, and in the process, you can get whatever devices your powers need to operate. This way, I'm in the clear and you can make your big breakout a tad easier.
Mission Acceptance
Come back to me once you have everything.
Unnecessary Solicitation
You need to go to the lockers and get the goods.
Mission Objective(s)
- Retrieve Shiv/Devices
You have recovered the shiv that Jimmy asked for. In addition you have the pieces you needed to make your powers work at full efficiency. Looking over some of the other devices in the lockers, you find an Enhancement you can use to upgrade your powers.
| Crude Shiv | |
| This looks like part of a bedframe broken off and sharpened to a point. Rubberbands bound tightly on one end give it a rudimentary grip. |
Briefing
After this conversation, find Caze to learn about combat.
I'm sure you're out of practice in using your powers, so you should probably talk to Caze over there and learn the basics of combat. But before you go, I'll tell you a bit about figuring out how tough your foes are.
You can 'consider' or 'con' targets by clicking on them or using the tab key to highlight them. The target's name will appear in a color that indicates how tough it is.
GREY: These enemies are very weak and are worth no Experience Points to you.
GREEN: You have a large advantage over this enemy.
BLUE: You have a slight advantage over this enemy.
WHITE: Target is an even match for your abilities.
YELLOW: These enemies are tough, and give more XP.
ORANGE: These enemies are very tough, and caution should be taken around them.
RED: These enemies are extremely tough and are worth a lot more XP.
PURPLE: These enemies are the top of the food chain and should only be attempted when you are in a strong group with other Villains.
Foes come in multiple varieties as well, the most common being Minions, Lieutenants and Bosses. You can usually tackle a few even-level Minions at one time, and probably stand toe-to-toe with a lone same level Lieutenant. A Boss of your level will put up a furious fight and you may need to team up with another villain in order to take him out.
Now go on and see Caze, he can explain Health, Endurance, and how to use your powers.
Talk to Caze
Unnecessary Solicitation
You need to talk to Caze now.
Mission Objective(s)
- Talk to Caze
Briefing
After this converstion, find Blake to learn about Enhancements
Angel sent you, eh? Well a lot of folks here are out of practice when it comes to combat. That won't impress anyone in Arachnos, and you better impress them if you plan to stick around for long. Sure, they think you're hot stuff now. That won't last if you can't show them some mad skills.
First off let me explain your health bar. This is the bar in the upper right of your screen that shows you how many Hit Points you have left.
When the bar is completely empty you are defeated and will be asked if you want to go to the nearest hospital or infirmary. Below the health bar is the Endurance bar. This bar shows you how much Endurance you have left to use your powers. Each time you activate or maintain a power, it eats up Endurance. If you don't have enough Endurance to activate or keep up a power, then you will see the text 'Too Tired,' and you will have to wait until you have Endurance enough again to use your power.
NOTE: If you are a Brute or Dominator Archetype you will have a third bar, a Rage Meter for Brutes and a Domination Meter for Dominators, below your Endurance bar. Check the manual or in-game Help files to understand these Meters better.
To activate your powers in combat, you simply click the icon in your Power Bar.
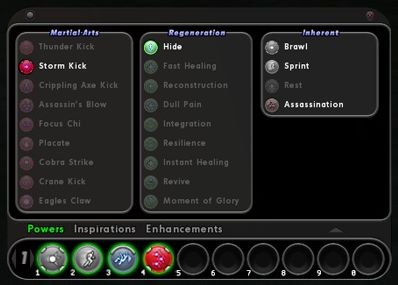
If you want to practice using your powers, you can click on any of the police drones behind me to target them, then execute your powers on them. You can open your Powers Window and place new powers into your Toolbar by clicking the Powers button on the Toolbar.
After practicing go see my pal Blake and he'll tell you how you can enhance your powers.
Blake is down the hole in this room.
Talk to Blake
Unnecessary Solicitation
You need to talk to Blake now.
Mission Objective(s)
- Talk to Blake
Briefing
After this conversation find Morben to learn more about Enhancements
I see my pal Caze showed you how to use your powers, that's good, now I'll teach you about Enhancements.
Enhancements are additions to your powers that make them work at better effectiveness by 'Enhancing' a specific aspect of your power.
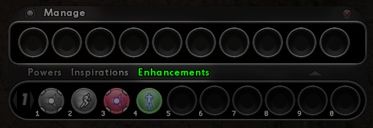
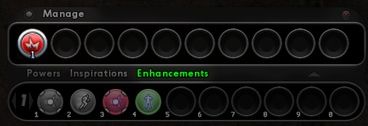
If you click the word Enhancements above your Power Bar, you will bring up an inventory of Enhancements you are currently carrying. If you click the word Manage above that, you will be able to 'slot in' Enhancements into your powers.
On the Management screen you can try slotting in the Damage Enhancement you received earlier. Simply drag and drop it into any legal (green) Enhancement Slot.
To learn more about Enhancements, including the Levels and how they affect their power, consult the Help file or the Manual.
Now go see Morben and he can explain how to combine Enhancements to make them stronger.
Talk to Morben
Unnecessary Solicitation
You need to talk to Morben now.
Mission Objective(s)
- Talk to Morben
Briefing
After this conversation seek out your next contact Sakai Tamaki
It's possible you have a great future within Arachnos, Character. So don't screw it up. Something you should know is that you can extend the life of Enhancements by combining identical ones. You do this by clicking the Power Name in the Enhancement Management screen. There you can pick the slotted Enhancement you want to combine, and then pick either an Enhancement in your Inventory or another one in the same power and click Combine.
Your chance of combine success depends on the differences in level between the two Enhancements. Any Enhancement can only be combined twice. Every time an Enhancement is combined it gains a +, extending its life by 1 level. If it has ++ it can not be combined any further and must be replaced instead.
I've given you another Damage Enhancement so you can practice Combining if you want.
Now you must go out into the Yard and talk to Tamaki. He has been in direct contact with Arachnos and can explain the situation further.
To get to the Yard, exit the sewers through the grates at the end. If you're destined for greatness, this is your first step.
You received Training: Damage.
Go to Sakai Tamaki
Unnecessary Solicitation
You need to go see Sakai Tamaki.
Mission Objective(s)
- Go to Sakai Tamaki
Briefing
Lord Recluse, the most glorious leader of Arachnos, thinks that you may be a predestined soul. His Fortunata, Kalinda, has seen that you may well be one of those who can lead Arachnos to eventual victory over the heroes of Paragon City. We'll see about that. From what I hear, you still have a lot to learn, and even Kalinda isn't sure exactly who her prophecy pertains to. She just knows they're here in the Zig. I've been instructed to issue you a test of your combat abilities. If you pass, then you will be escorted to Mercy Island. Then Kalinda can test you for herself.
Click on ask about available missions to proceed.
Mission Debriefing
The debriefing screen is blank -- there is no text.


